Translate

Showing posts with label machine embroidery. Show all posts

Tuesday, March 18, 2014

Some more machine embroidery

I had the brilly idea that instead a buying a paper calendar this year, I would use a dry erase calendar board and make little quiltlets (ooh, that's a cool word) or wall hangings to be the picture above the board. So far, the first three months feature machine embroidery, which goes along with the theme I started last week; so I'll share them with you today.

January!
This is machine embroidery applique from Anita Goodesign. I was actually prepared ahead of time for January so was able to do this more involved design. I used metallic thread for the lines in the snow and I tried everything to get it to quit breaking, but wasn't very successful. Good thing there wasn't much stitching in that part! I do love how this one turned out.

February
You can probably tell that I waited until the last minute to do February, but it's still cute. This is a nice design from Embroidery Library. When using quilter's cotton fabric, the embroidery turns out much better if there's batting behind it while the stitching happens. Notice the puckering even though I used cutaway stabilizer. I was kinda bummed about that, but didn't have time to redo it  :(

March!
I did March on Sunday before going back to work on March 3, so again a bit last minute. But I had this one figured out ahead of time. This is also from Embroidery Library and done on white felt. I found out that's what they use for all the stitch-outs on their website. No puckering - yeah! I cut the felt into an oval after embroidering and stitched it to a quilt sandwich (the green fabric, batting & backing fabric). I did some light machine quilting on the "sandwich" before adding the oval. The green ric rac covered the edges of the oval nicely. 

I got the wire hanger at a quilt show and it comes apart so I can easily switch to the next month's quiltlet. 

Oh, and have you ever sewn the hanging sleeve on using the hemmer foot on your sewing machine? It's SO easy! I hate hand sewing so this is a great technique that makes me very happy. I learned about it in a class at Cathey's Sewing & Vacuum catheys.com, which is where I got my new embroidery machine. I'll try to get some how-to photos of the hanging sleeve for April. (Uh, oh, better get started on April's quiltlet!)


Thursday, March 13, 2014

Wifi problems; now I'm late - but cool machine embroidery

Bah, my wifi was down last night so I couldn't do a new posting. It kept saying, "Your internet is unstable" - what does that mean???

Anywhooo, let's take a break from longarm quilting an talk about machine embroidery.

Isn't this darling?!!

Machine Embroidery Applique

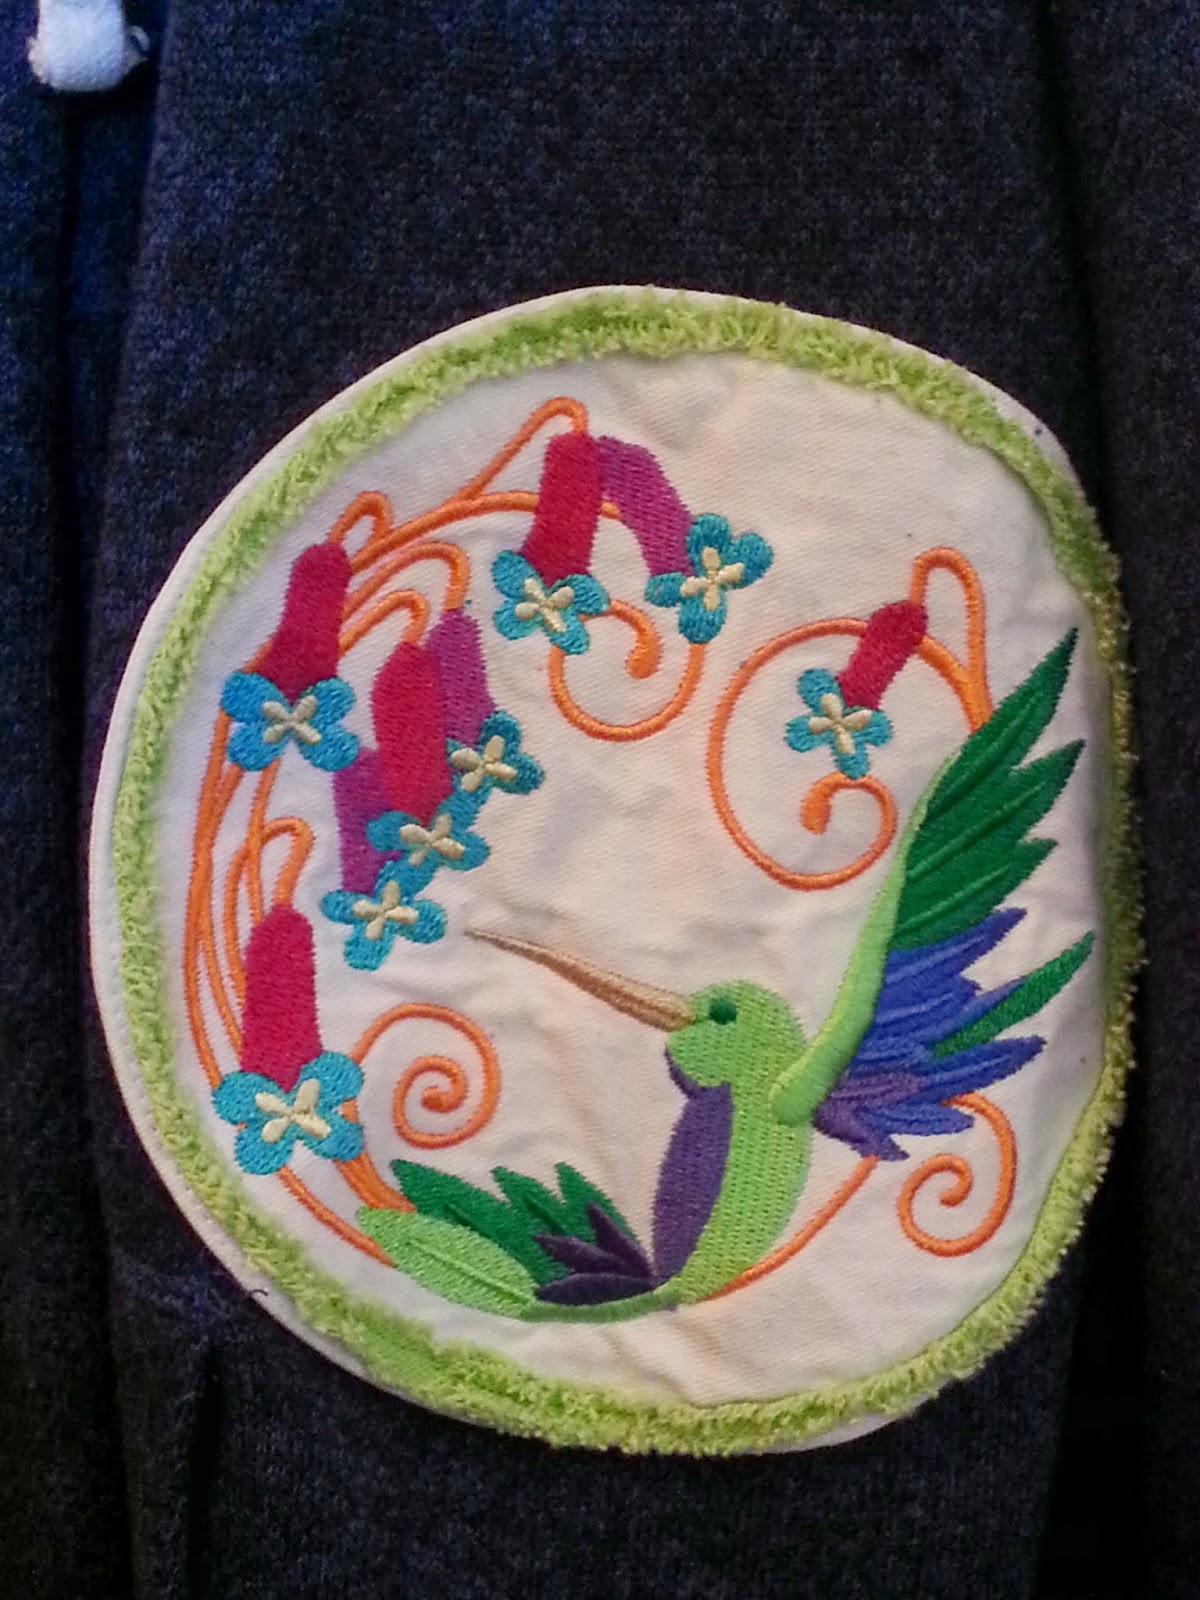
I love machine embroidery; it's like magic!  I bought some lounge pants and matching jacket for my MIL and fancied them up.

Before :(
and.......
Much better ;)
I was afraid to embroidery right on the jacket so did it on lightweight duck cloth and attached the circle medallions to the front of the jacket. I added bias chenille trim that I got at our local quilt show.


Then I got brave and hooped the jacket to do the design on the back. It worked perfectly!

If I'm remembering correctly, the 2 front designs are from Embroidery Library at emblibrary.com. I love their website; they have tons of great tutorials, projects and ideas! The super cute design on the back is from The Anita Goodesign collection called Home Tweet Home anitagoodesignonline.com. When I traded up for my new embroidery machine, I got a free year of the Anita Goodesign monthly club - like Christmas every month!

Maybe next time I should talk about my experience with 2 different brands of embroidery machine - a product review.  Would that be interesting or helpful?

Hm, I really do need to do some more machine embroidery applique - too cute!!

Monday, October 7, 2013

A Quick Little Bag

I got this kit for a trick or treat bag at the Quilt, Craft, Sewing Show last month and finished making it this weekend.

It has pieces of metal ruler in the front and back orange part so the bag stays shut. I'll make some more of these, but I'll change a few things: I'd make them a bit bigger and the stacked prairie points bigger too. It would be fun to do some white ghosts or something on the black straps. Ooh, a button or embroidery on the purple points would be fun too.

You can't see it, but I did free motion quilting on the black part. For me, it's sooooo much easier to quilt on the longarm than my DSM. I have the hardest time getting the tension right - extreme pokies on the back. I finally got the extra bobbin case, loosened it 3/4 of a turn and cranked the top tension to 6. The bobbin thread still just lays on the bottom fabric but at least most of the pokies are gone.

This is a good size for my youngest grandson.

Thursday, June 27, 2013

quilting detail - the twin quilts Part TWO!

I can't believe I forgot to talk about the embroidery part and the feathers! Here are the twin quilts again.

I quilted feathers in the red areas on the green/gray quilt. I can't even see them when I zoom in - probably cause I used Superior's So Fine thread.

I also quilted this one first. I wasn't sure how to handle the machine embroidered area and on the first one I did wavy lines in the white around the embroidery. It didn't thrill me but it was okay. In the embroidered hearts on the red quilt, I did one-way hatching right thru the embroidery with So Fine white and I was surprised with how good it looks.

If you're not into quilting, this is probably way too much detail; but if you quilt, maybe this is helpful. I study other people's quilting blogs, especially longarm quilters. I always learn a lot from their sites and everyone has great ideas. If more detail would interest you, please let me know. thanks